Go to “Memberships > Dashboard” where find “Membership Levels” and create as per your plan. Check this youtube video to know more details how to create Membership levels. https://www.youtube.com/watch?v=7H4nH7nPlww
I strongly suggest you to watch all these videos before creating Membership site, then you will get complete idea how to install and set up it.
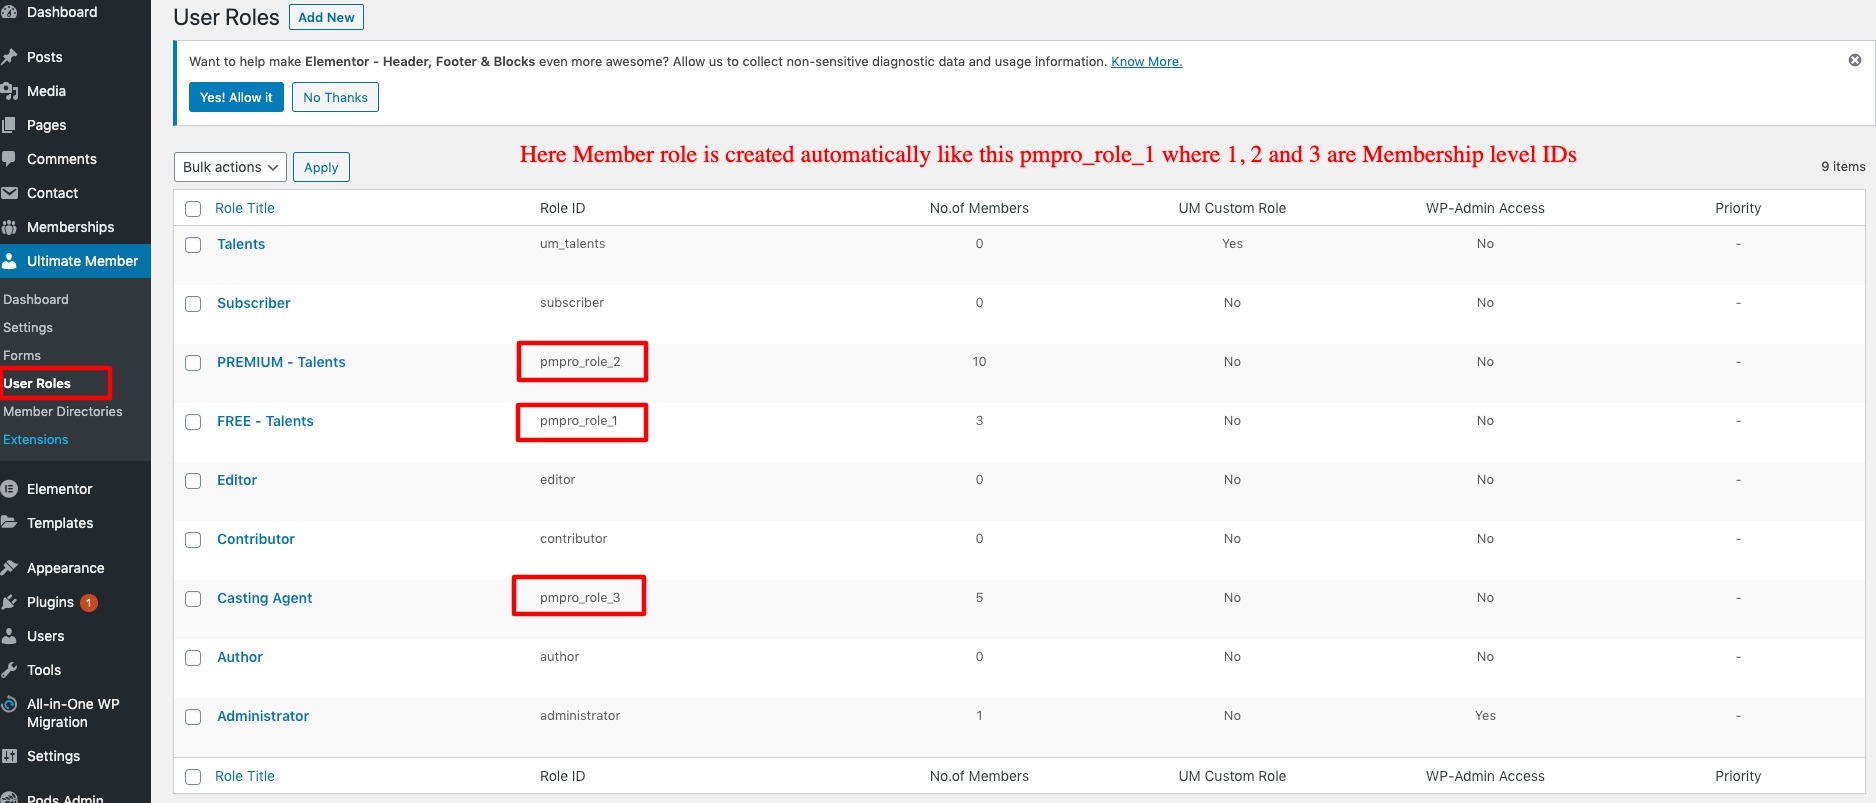
After creating Membership levels and pages like shown in video tutorial above, go to “Ultimate Member > User Roles” where you can see the Membership Levels roles are automatically created, if not make sure that you install and activated PMP Pro Roles Plugin mentioned above point 3.
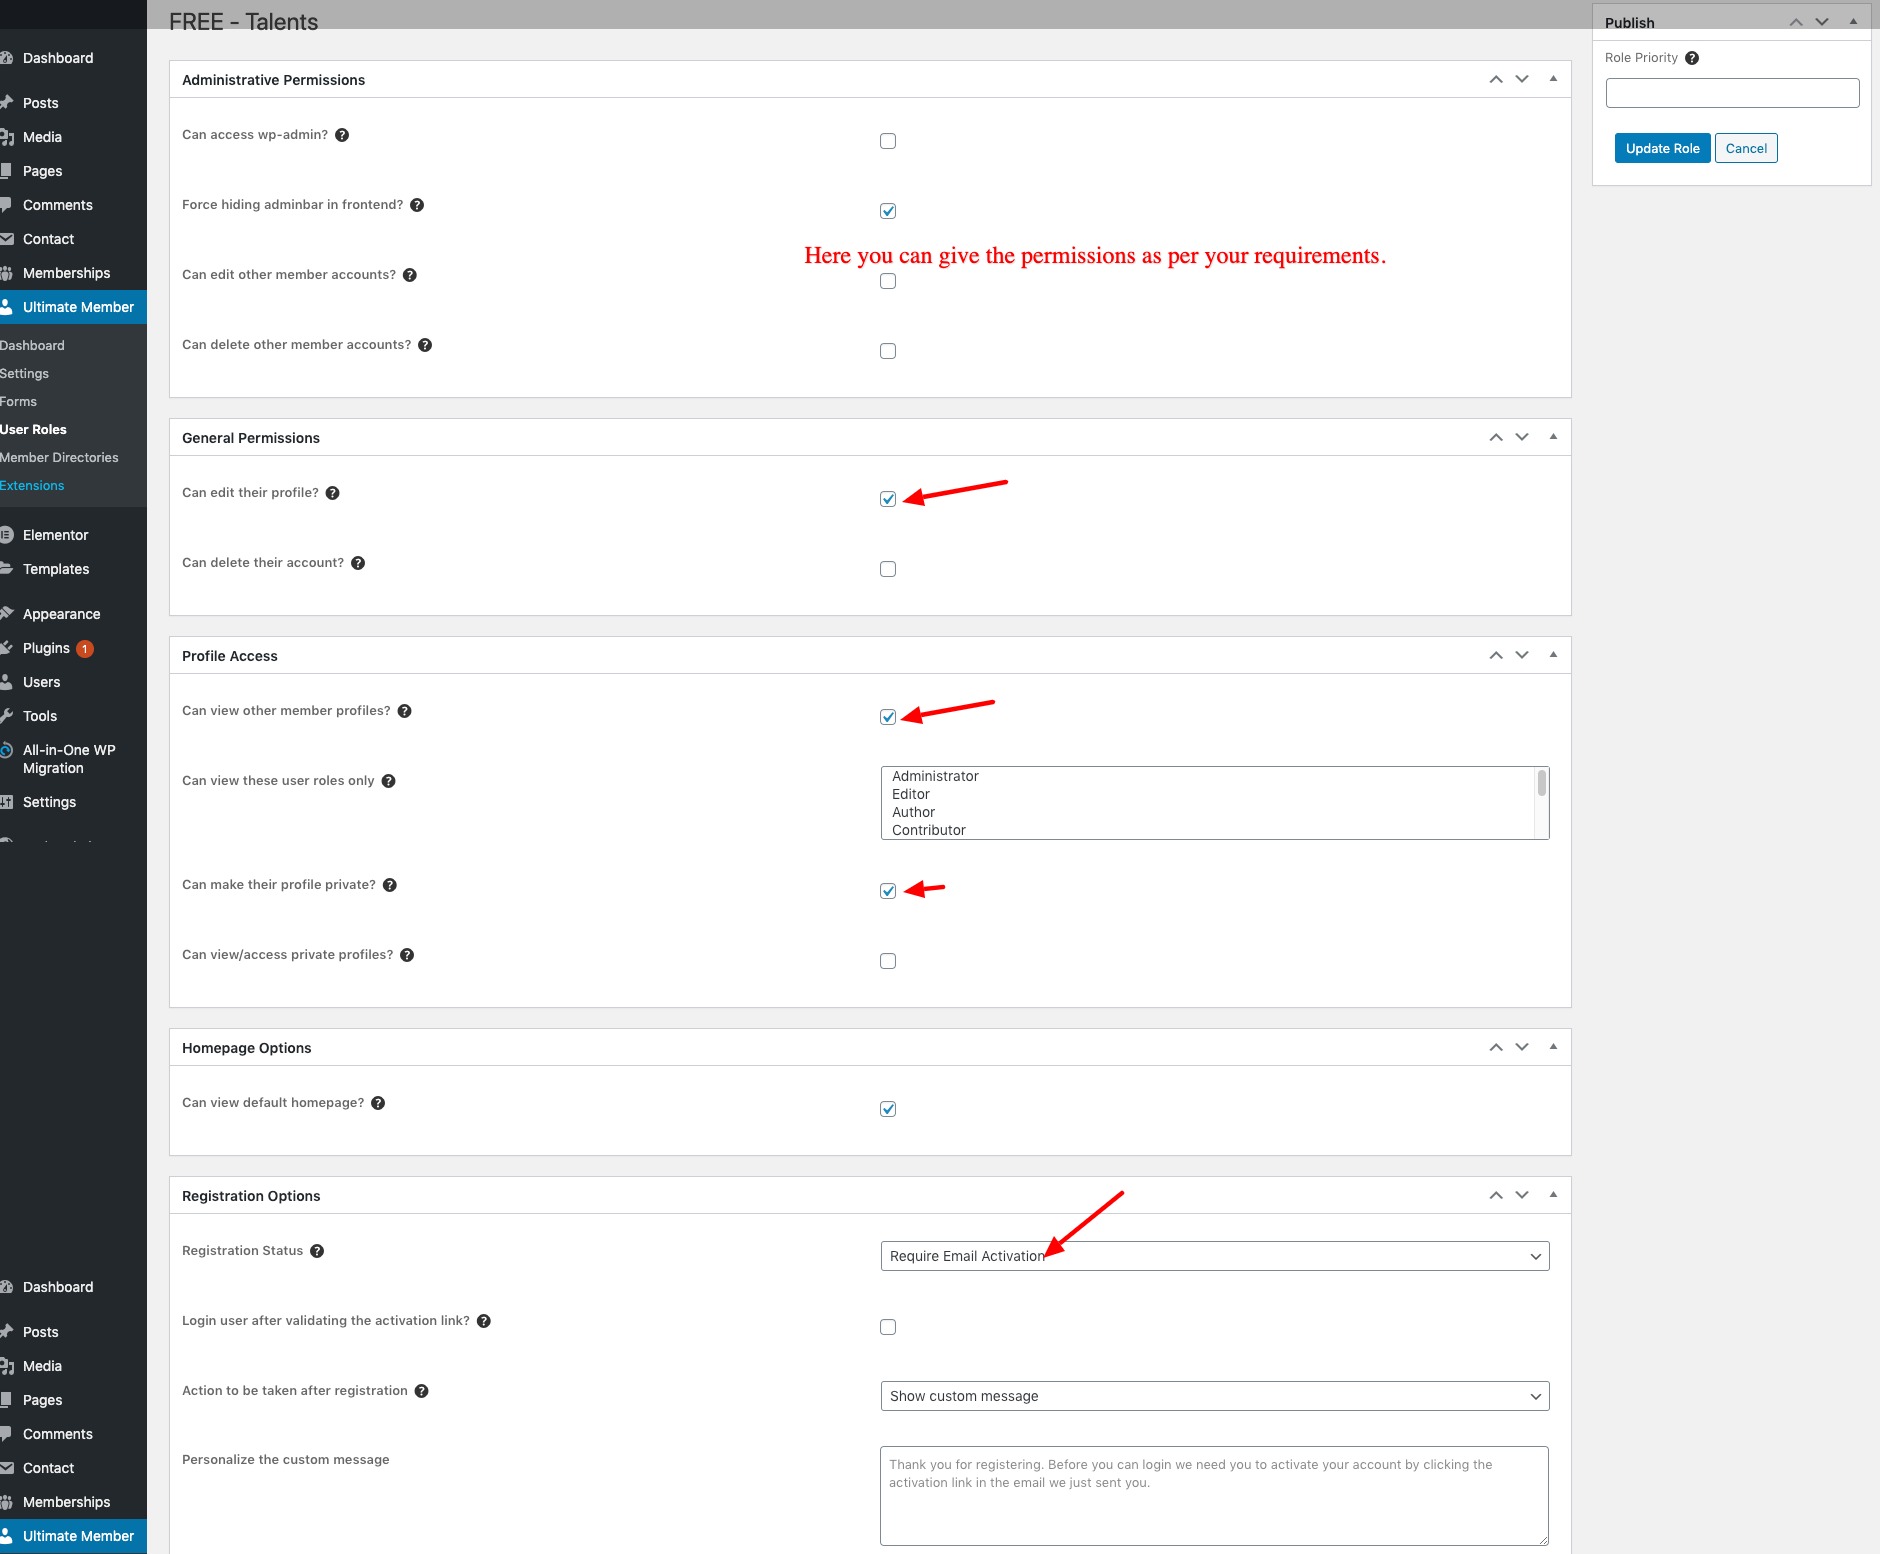
Click on Role which you want to assign permissions. Where you can give permissions like, the member can edit their profile, view other profiles.
Create Pricing table using Elementor – Kaya Pricing Table widget. Watch this video tutorial to know how to create Subscription or Paid Membership Level pricing table.
After creating Pricing table, you need to create unique forms for specific user roles, suppose you have FREE User and Paid Users on your site, you want to provide basic form with few fields for FREE user and Full complete form with all fields for Paid Users I mean Talents in this case you must create unique profile forms, so please go through this Tutorial to get an idea how to do this task.
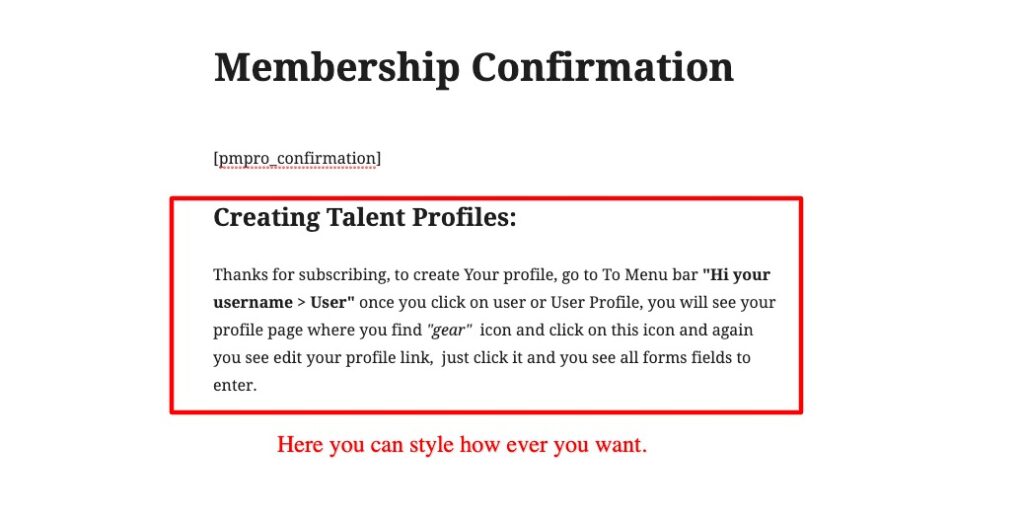
After signup through the Paid Membership Pro Registration form, user land on “Membership Confirmation” page, where you need to add clear details on how the user can go to profile page and create Talent profiles. Membership confirmation is already generate, go to pages and edit the page and add your details instructions like below.