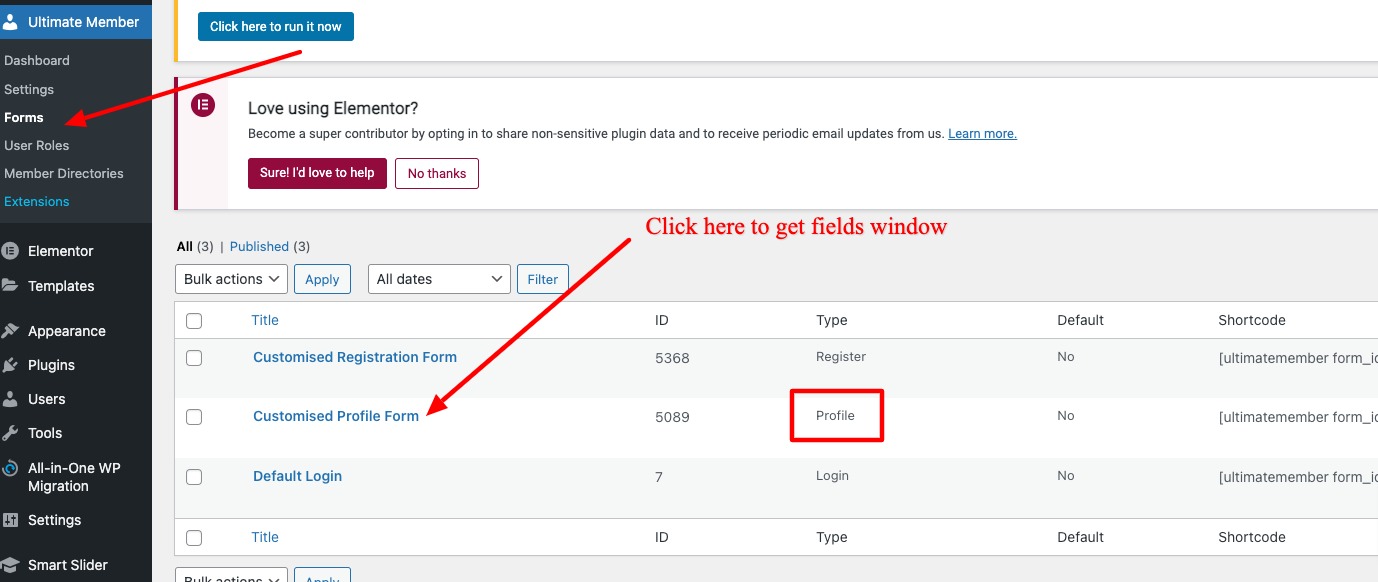
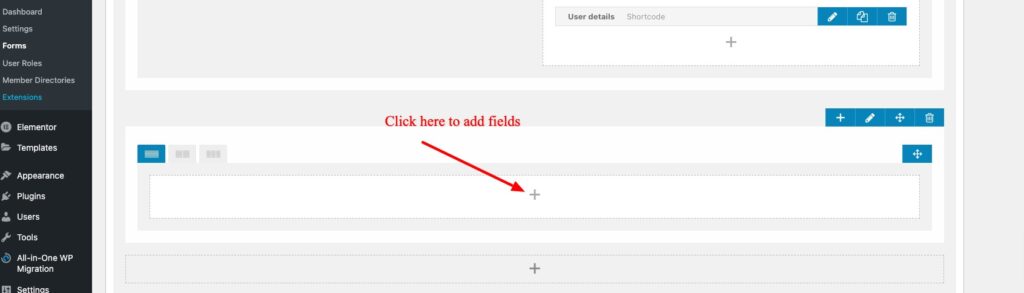
In order to create gallery Go to “Ultimate Member > Forms” where you need to click on Profile form.
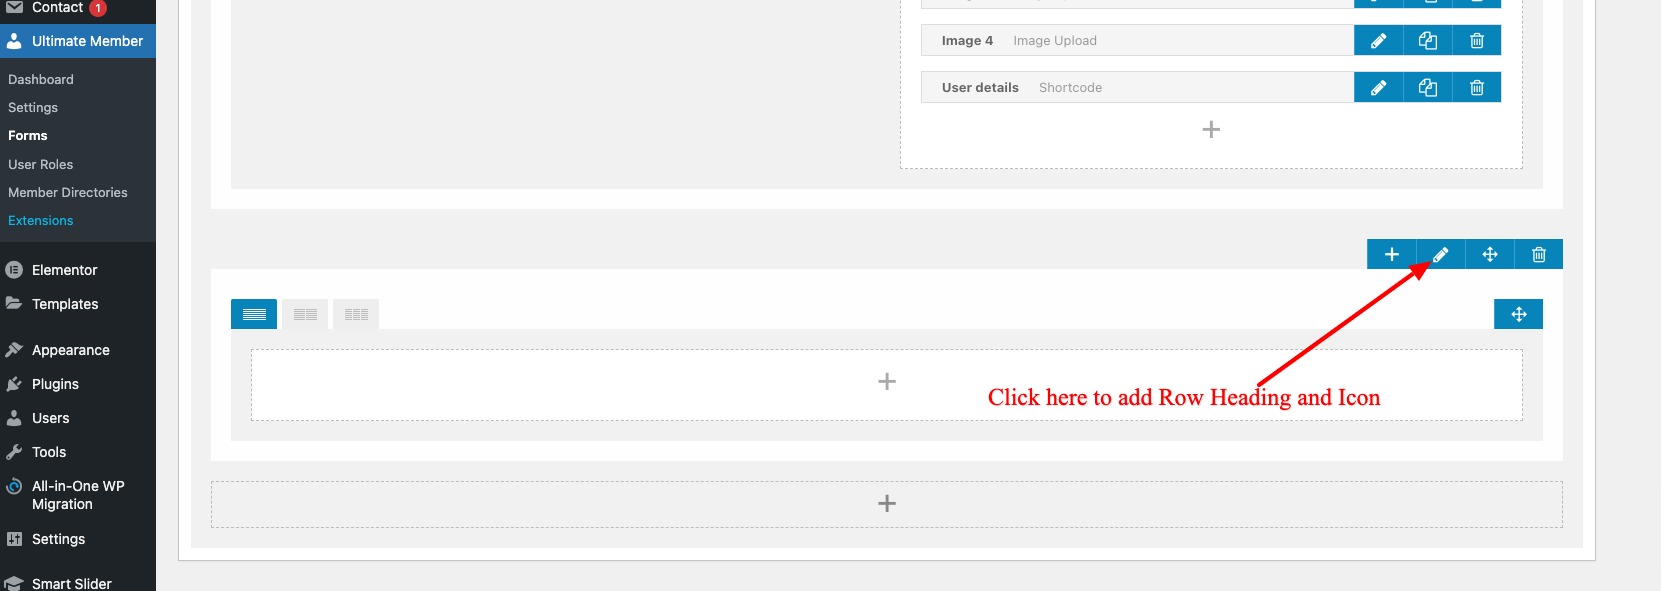
Once you click on Profile form you will see a form with all fields added, now we need to create serrate Row section for gallery images so click on “Row + icon” like shown below image.

After that you get a popup window and see a checkbox to enable for adding Row Title, Icon and its class names.

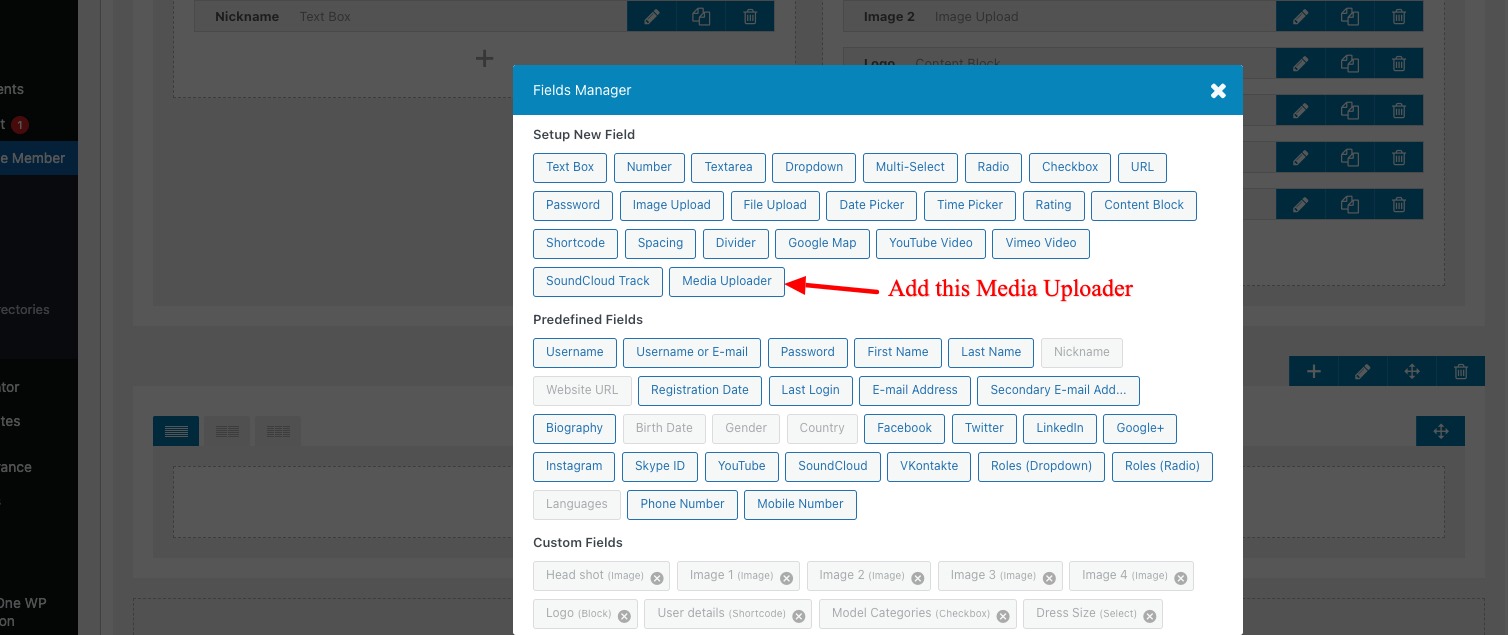
Now add “Media Upload” field in the gallery row.
After adding Media uploader custom field now you need to save the changes by clicking on Update button located top right of the form page.
Now go to Profile page and find a gear icon over the profile photo ( note: for some themes its located top right side ) click on this icon and you will see a drop down menu and click on “Edit Profile”
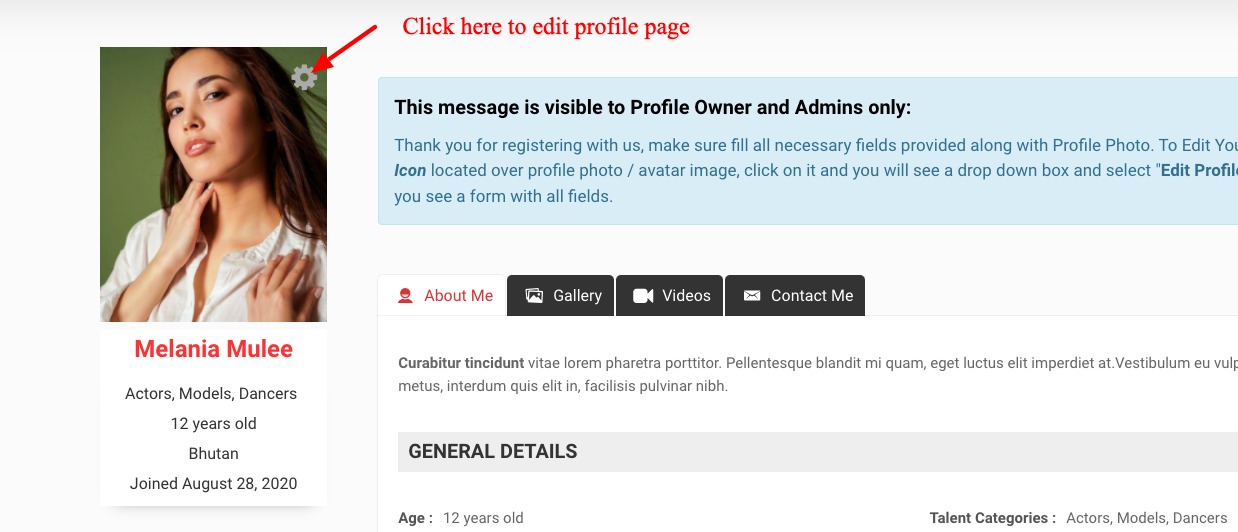
You can see edit profile fields, here you can see the “Add Media” button in Gallery section.

Click on “Add Media” button and see a WordPress default Media Uploader window, where you can see an options to create Image Gallery.

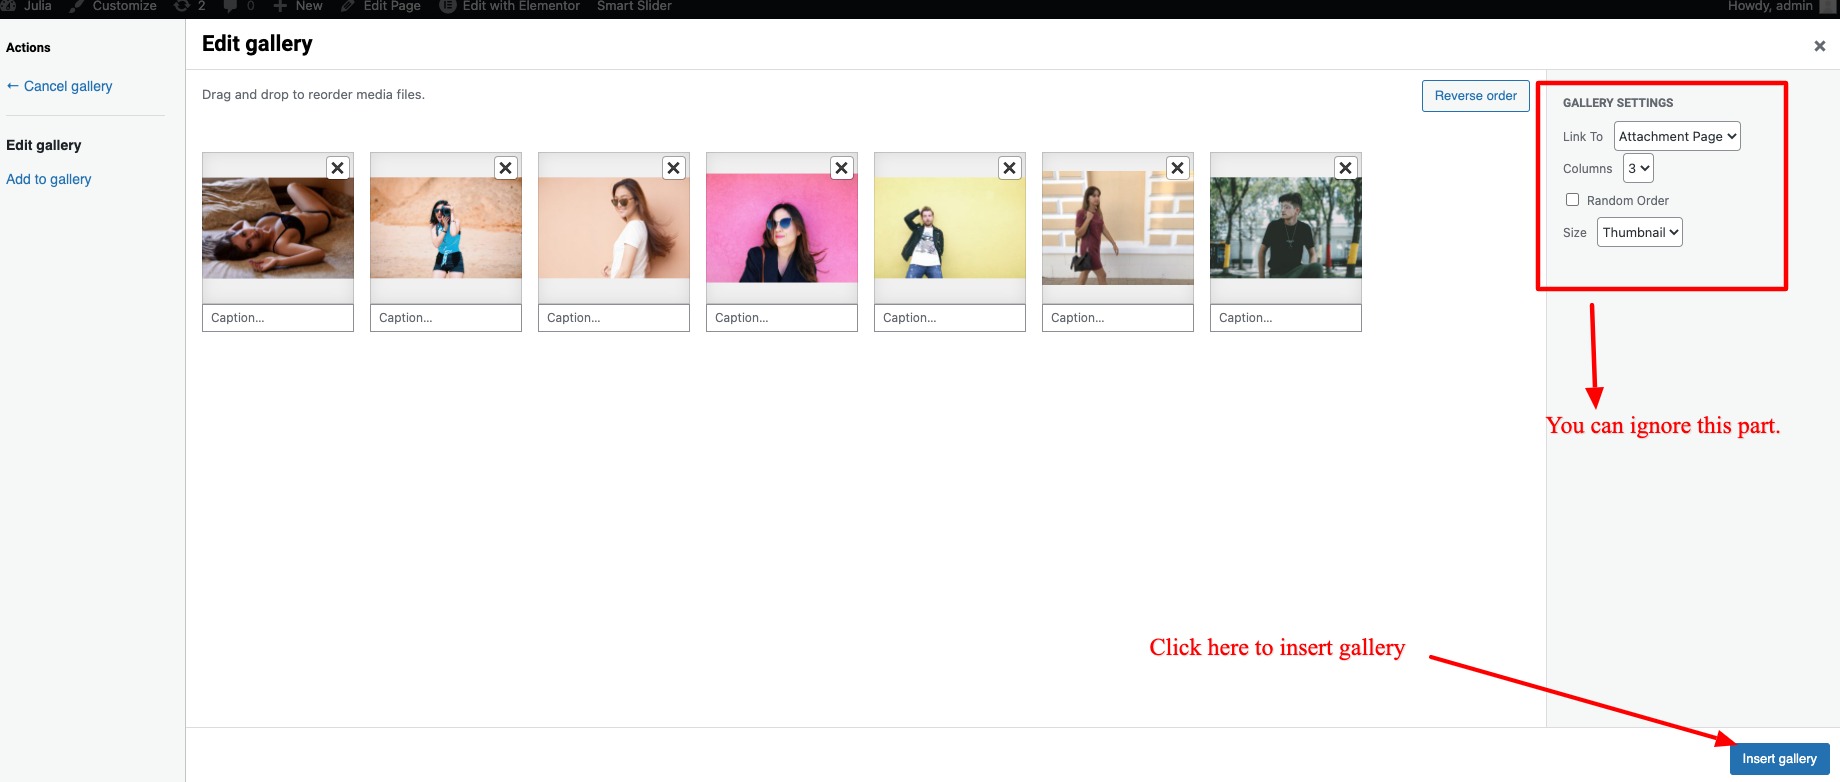
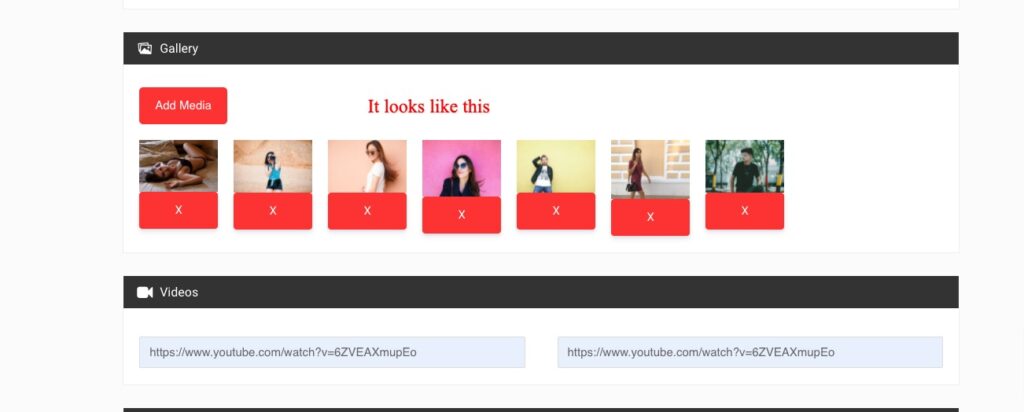
After adding Gallery images you see the images like below where you can remove and add another gallery images if you want.
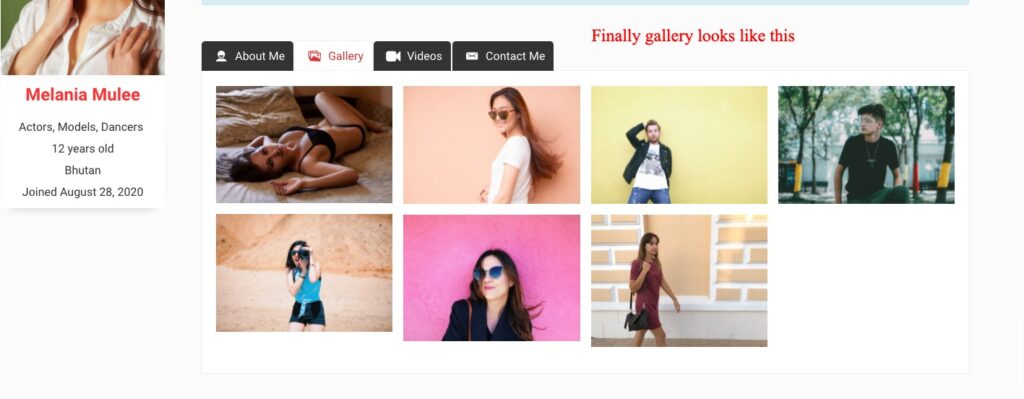
Finally the gallery page looks like this.
By default theme comes with simple light box effect, if you want more effective lightbox effect you can use this plugin.
Note: After installing Simple Light box plugin, you must disable the default light-box option by navigating to “Customize > Ultimate Member Section > Member Profile Page Settings > Enable Default Profile page Gallery Lightbox”.
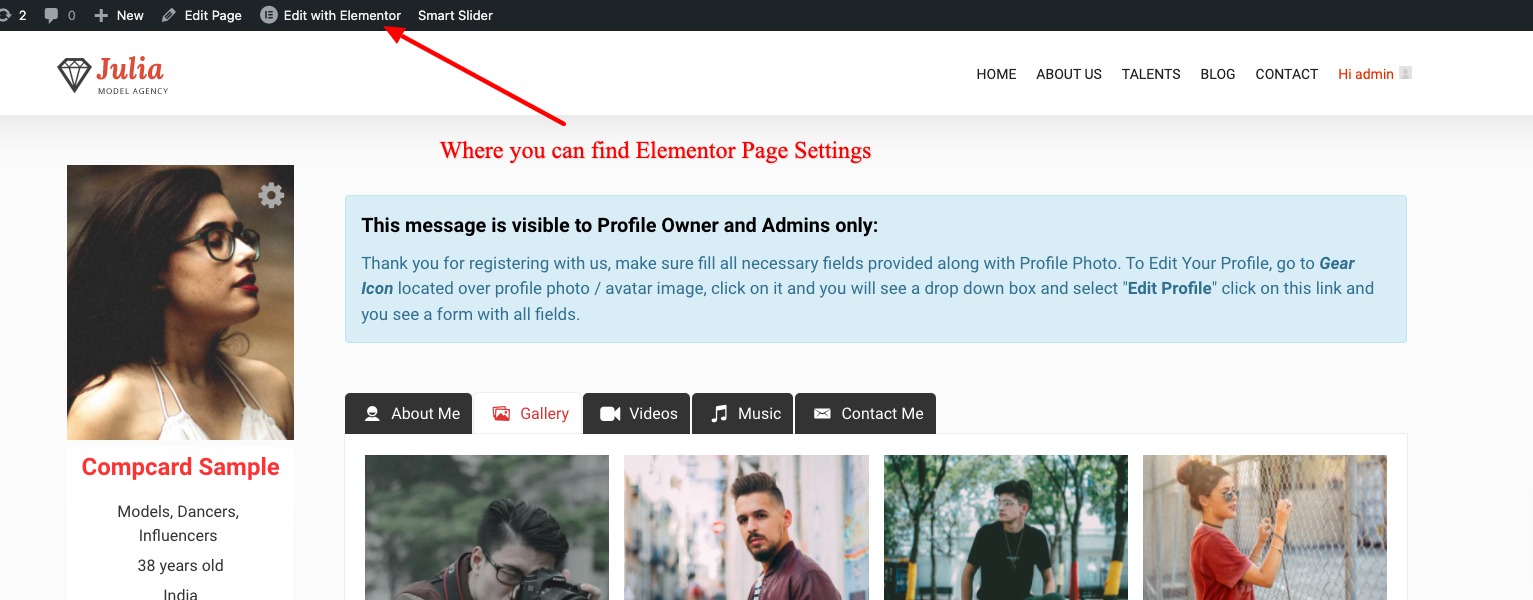
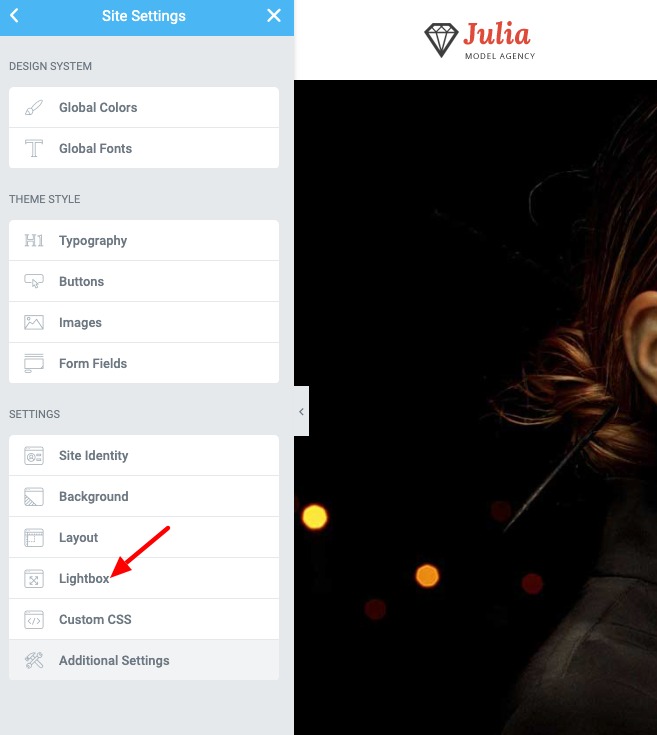
If you see any conflict in light-box, then you need to disable the Elementor default Light box option by opening the Profile page where on the top of the page you see “Elementor Page Settings” disable the light box.