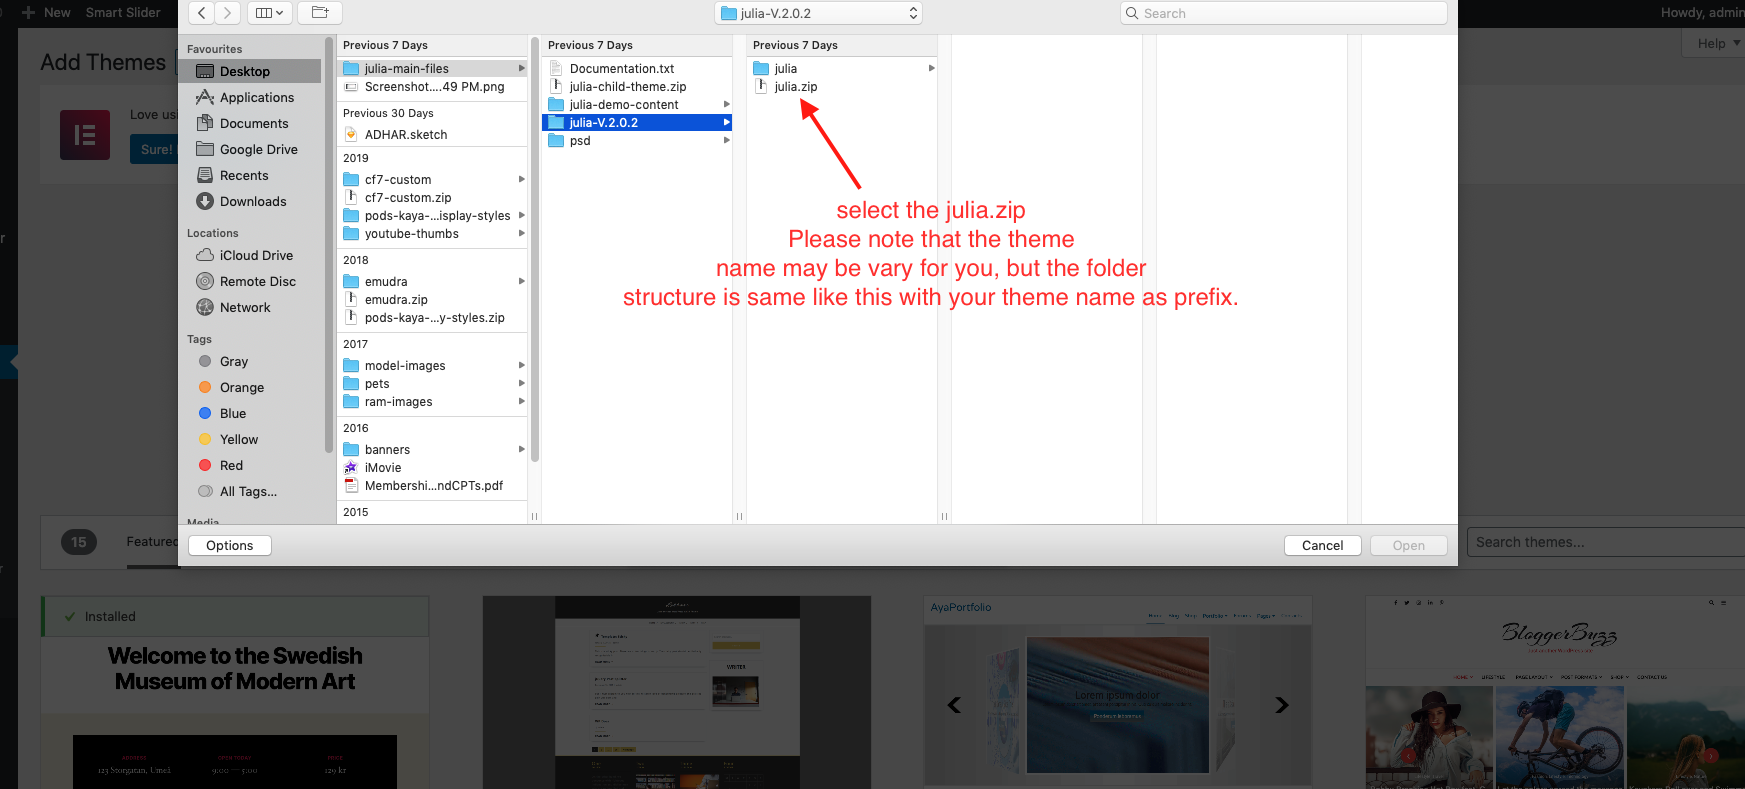
After downloading a theme from ThemeForest, unzip the file. Inside, locate the zipped theme file, such as `julia.zip`, which might be found in a path like `julia-main-files/julia-V.2.0.2/julia.zip`. This structure is typical for most themes, with the folder names varying according to your theme.
Next, log in to your WordPress admin dashboard. Go to **Appearance > Themes > Add New > Upload Theme > Choose File**. Select the theme file, such as `julia.zip`, and upload it. Once the installation is complete, activate the theme to apply it to your site.
-
- After activating the theme, an alert message will appear at the top of the page, prompting you to install the required plugins for the theme. Follow the instructions in the message to install and activate these plugins to ensure full theme functionality.
-
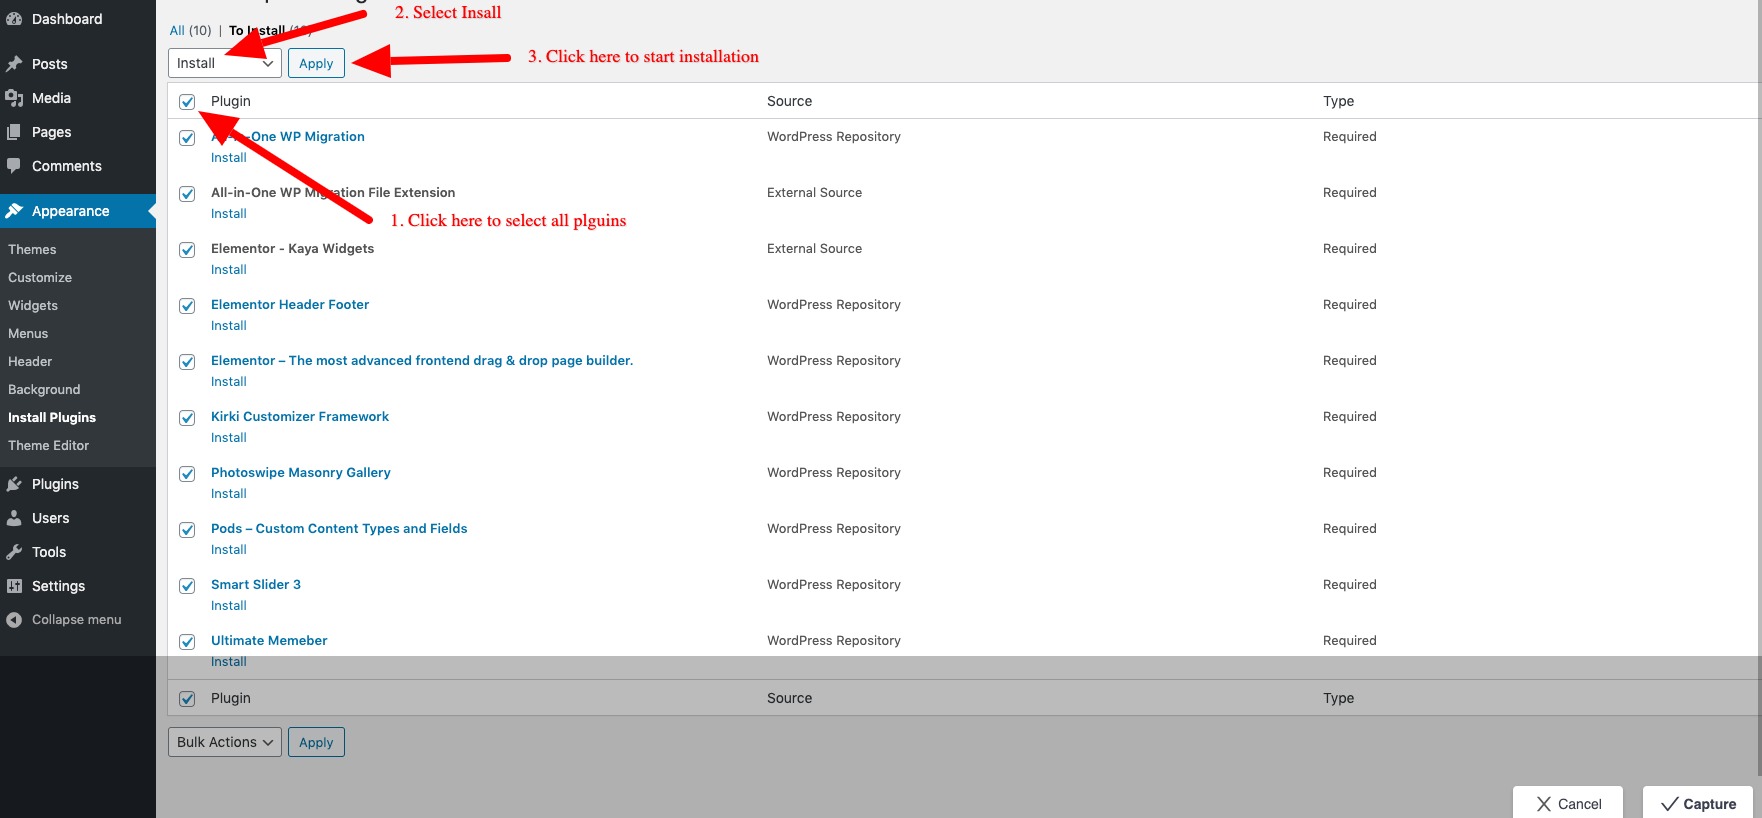
- Simply click on the **“Begin Installing Plugins”** link in the alert message. This will take you to a page where you can use the bulk installation option to install all required plugins at once, as shown in the screenshot below.
-
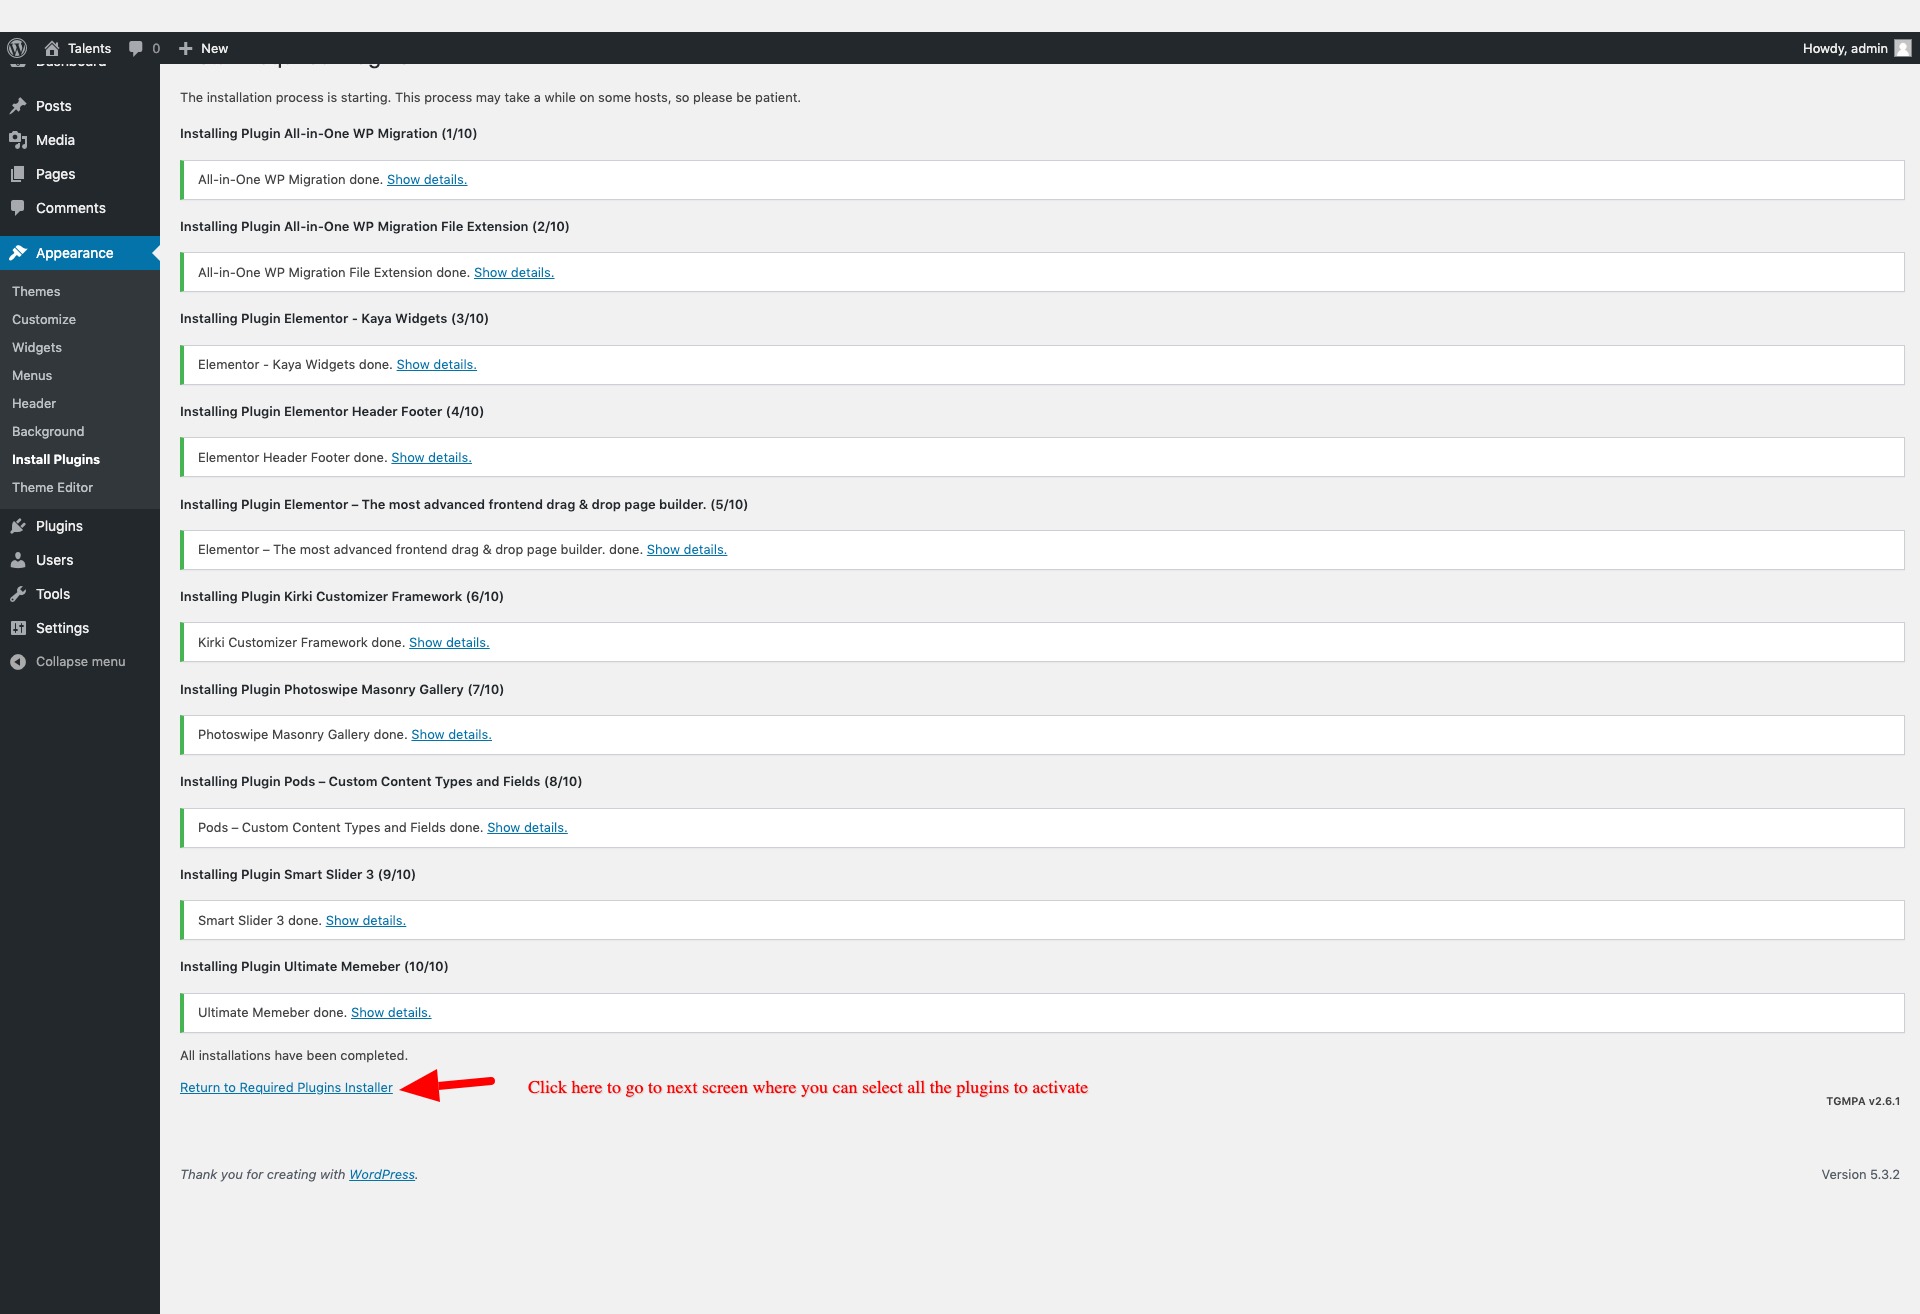
- The plugin installation process typically takes around 1-2 minutes. Once all plugins are installed, click on **“Return to Required Plugins Installer”** to proceed.
-
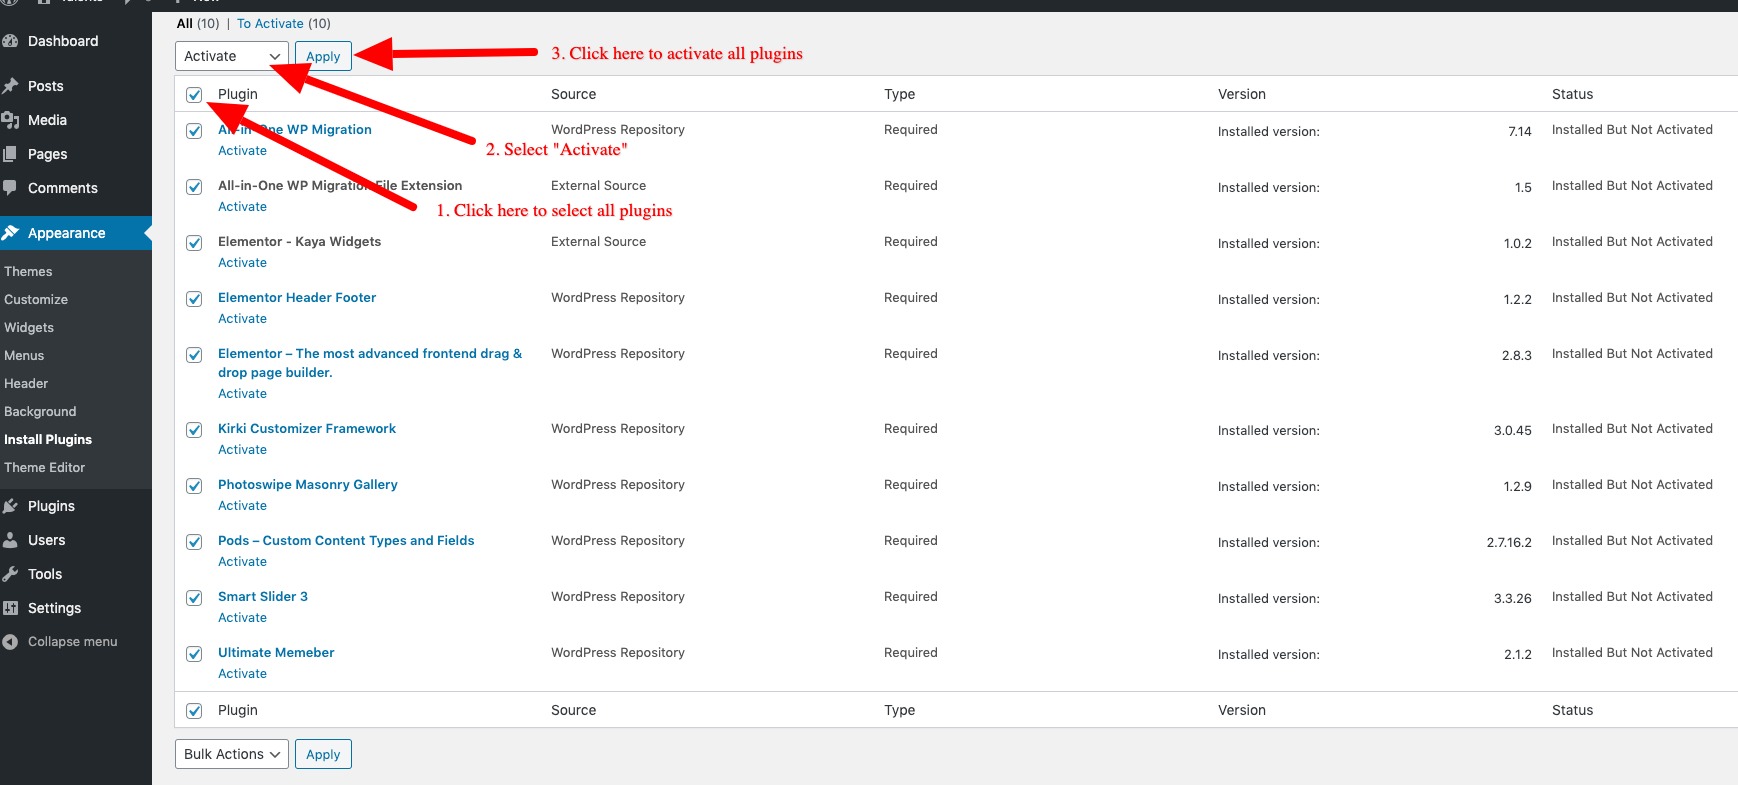
- On the Required Plugins page, use the **Bulk Activation** option to select and activate all plugins at once. This ensures all necessary plugins are activated and ready for use with the theme.
-
- For the final step, click on **“Return to the Dashboard”** to go back to your WordPress admin panel. Your theme and required plugins are now fully installed and activated.
You have now successfully installed and activated the theme along with its required plugins. You’re ready to start building and customizing your site!


