Username: admin
Password: admin
Once you install and activate theme and its required plugins, you need to import the demo data.
Check this tutorial how to install theme and its required plugins
Once you install and activate the theme and its required plugins, you can import the demo data using the one-click demo function. This will replicate the demo site, allowing you to easily modify or recreate content to suit your needs.
How To Import WordPress Content
Next, you must import the .wpress file into your new WordPress website. Follow these steps:
-
- Log in to the WordPress admin Dashboard.
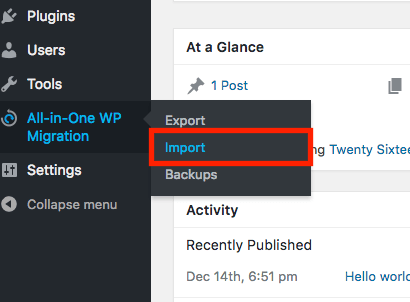
- Select the “All-in-One WP Migration -> Import” option
-
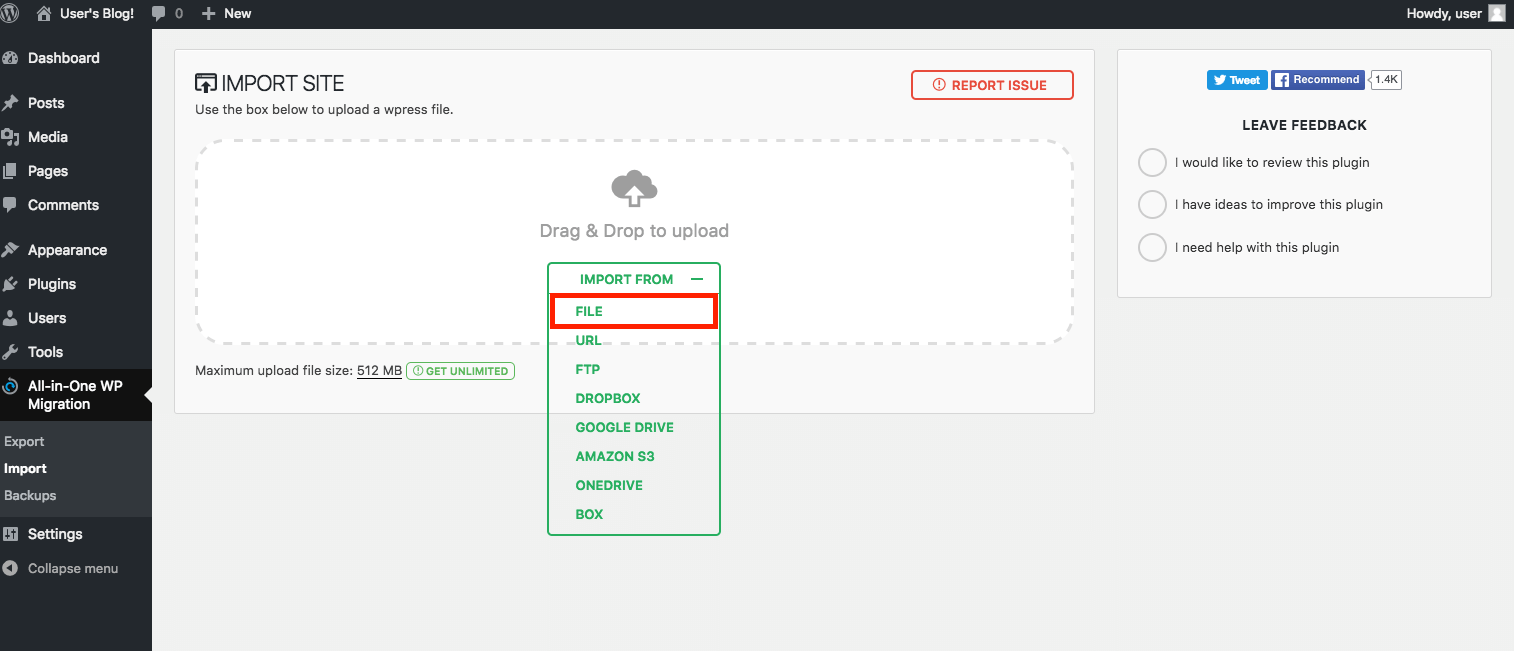
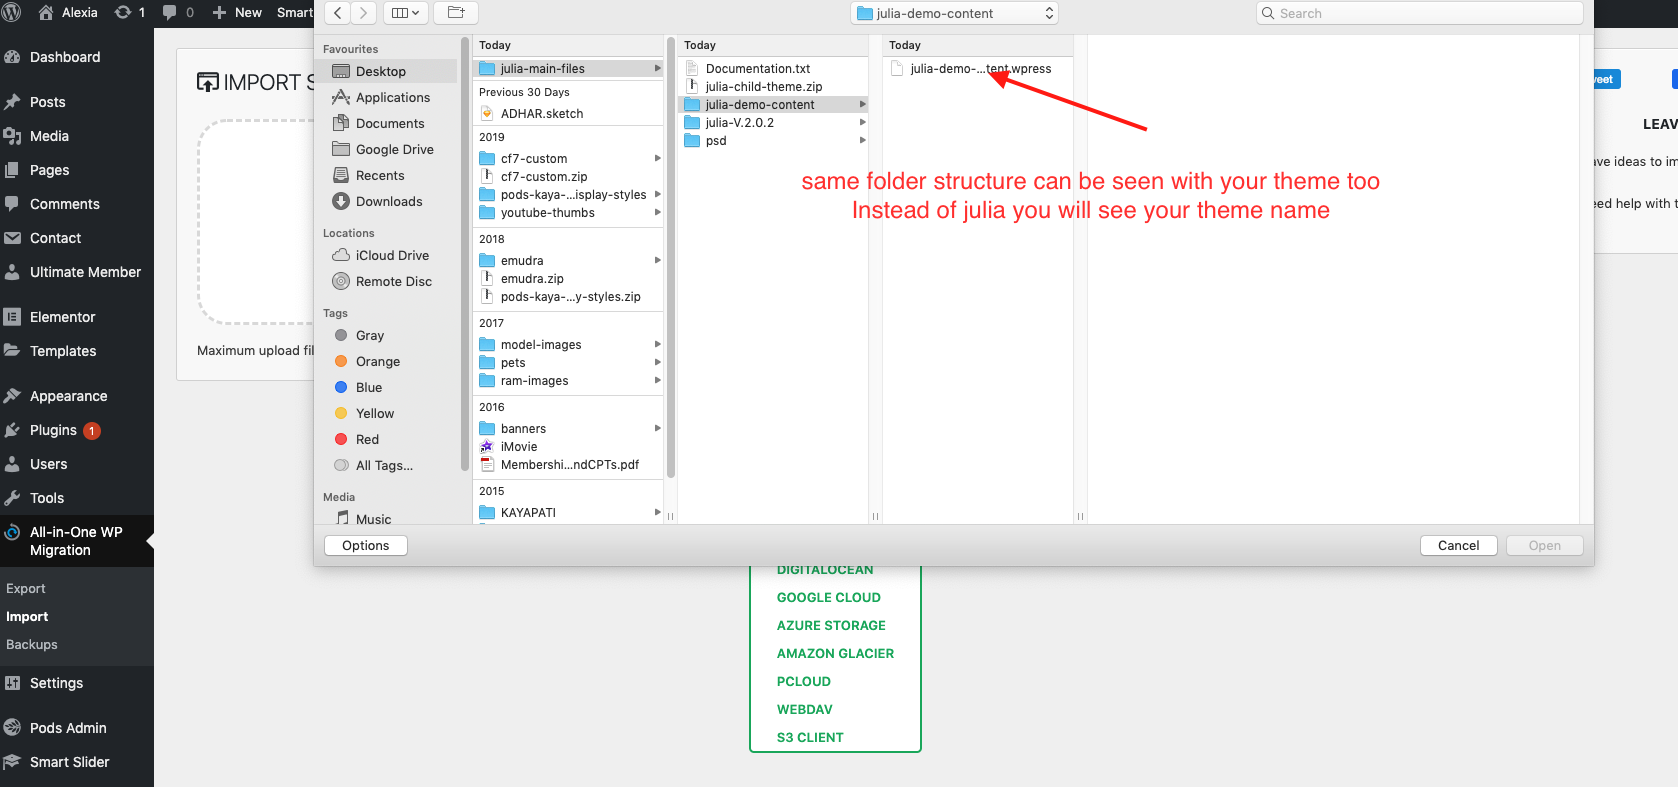
- You will see an option to select file, click the “File” button on the page and select the ‘julia-demo-content.wpress’ file which is located in your downloaded file, once you unzip the downloaded file, find a folder called “julia-main-files” in your case the prefix ‘julia’ will be your theme name
Note: please note that the theme name may be vary based on the them you are using. the prefix ‘julia’ will be changed to your theme name.
-
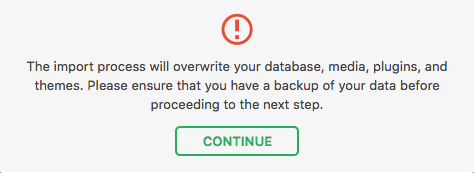
- The file will now be uploaded to the new WordPress instance. You will see a progress bar indicating the progress of the upload and will see an alert screen once the progress is completed 100%
- Click the “Continue” button for finishing the exportation process.
-
- You will now be presented with a success alert message. Click the “Permalinks Settings” link to proceed and you will be prompted to log in to the WordPress dashboard again
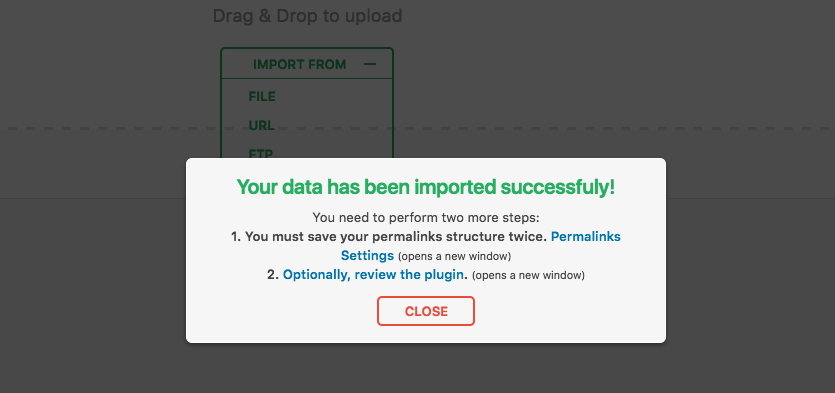
NOTE: At this point, you must log in using the below credentials and change password after login and save permalinks.
Username: admin
Password: admin
-
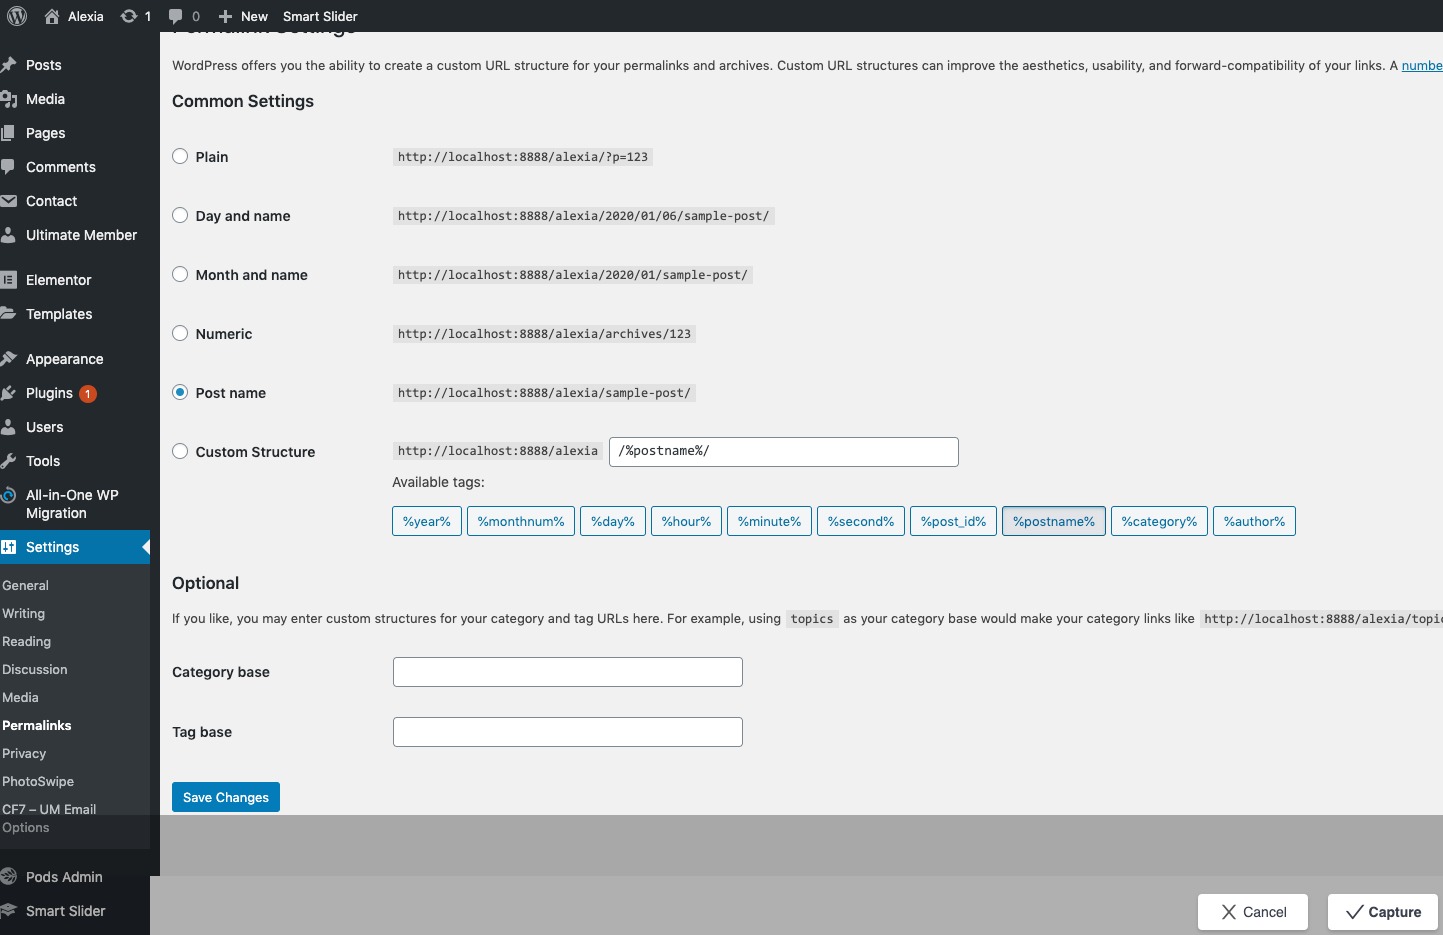
- Verify the permalink settings on the resulting page. In most cases, no changes will be necessary. Click “Save Changes” to save your changes.
At this step, it is recommended to click on Permalinks Settings link and save your permalinks twice in order to save them and generate .htaccess file.
- Verify the permalink settings on the resulting page. In most cases, no changes will be necessary. Click “Save Changes” to save your changes.
-
- Last and final step is, navigate to “Settings > General” and change the “Administration Email Address” to your own email address.

The demo content should now be fully migrated and usable on the your site.
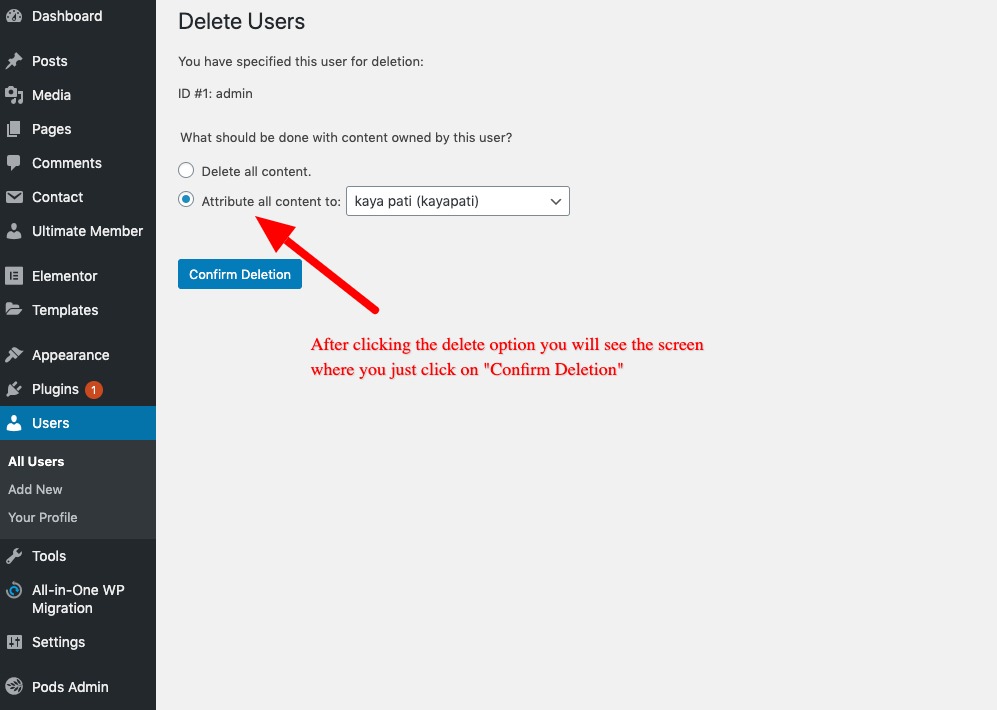
Note: If you would like to remove the admin user after you logged in using your own user account, go to “Users > select the admin” and click delete and you will get a screen where choose ” Attribute all content to” your user name and click on “Confirm Deletion” button.
If you see any issue while importing or see 0% even after waiting few minutes, follow this tutorial.